

You order a beautiful new toilet for your bathroom remodel, but it arrives and will not connect to your floor drain. A wrong toilet rough in causes costly installation delays, wasted labor, and damaged wall tiles. You can avoid this headache by confirming your exact bathroom layout before purchasing.
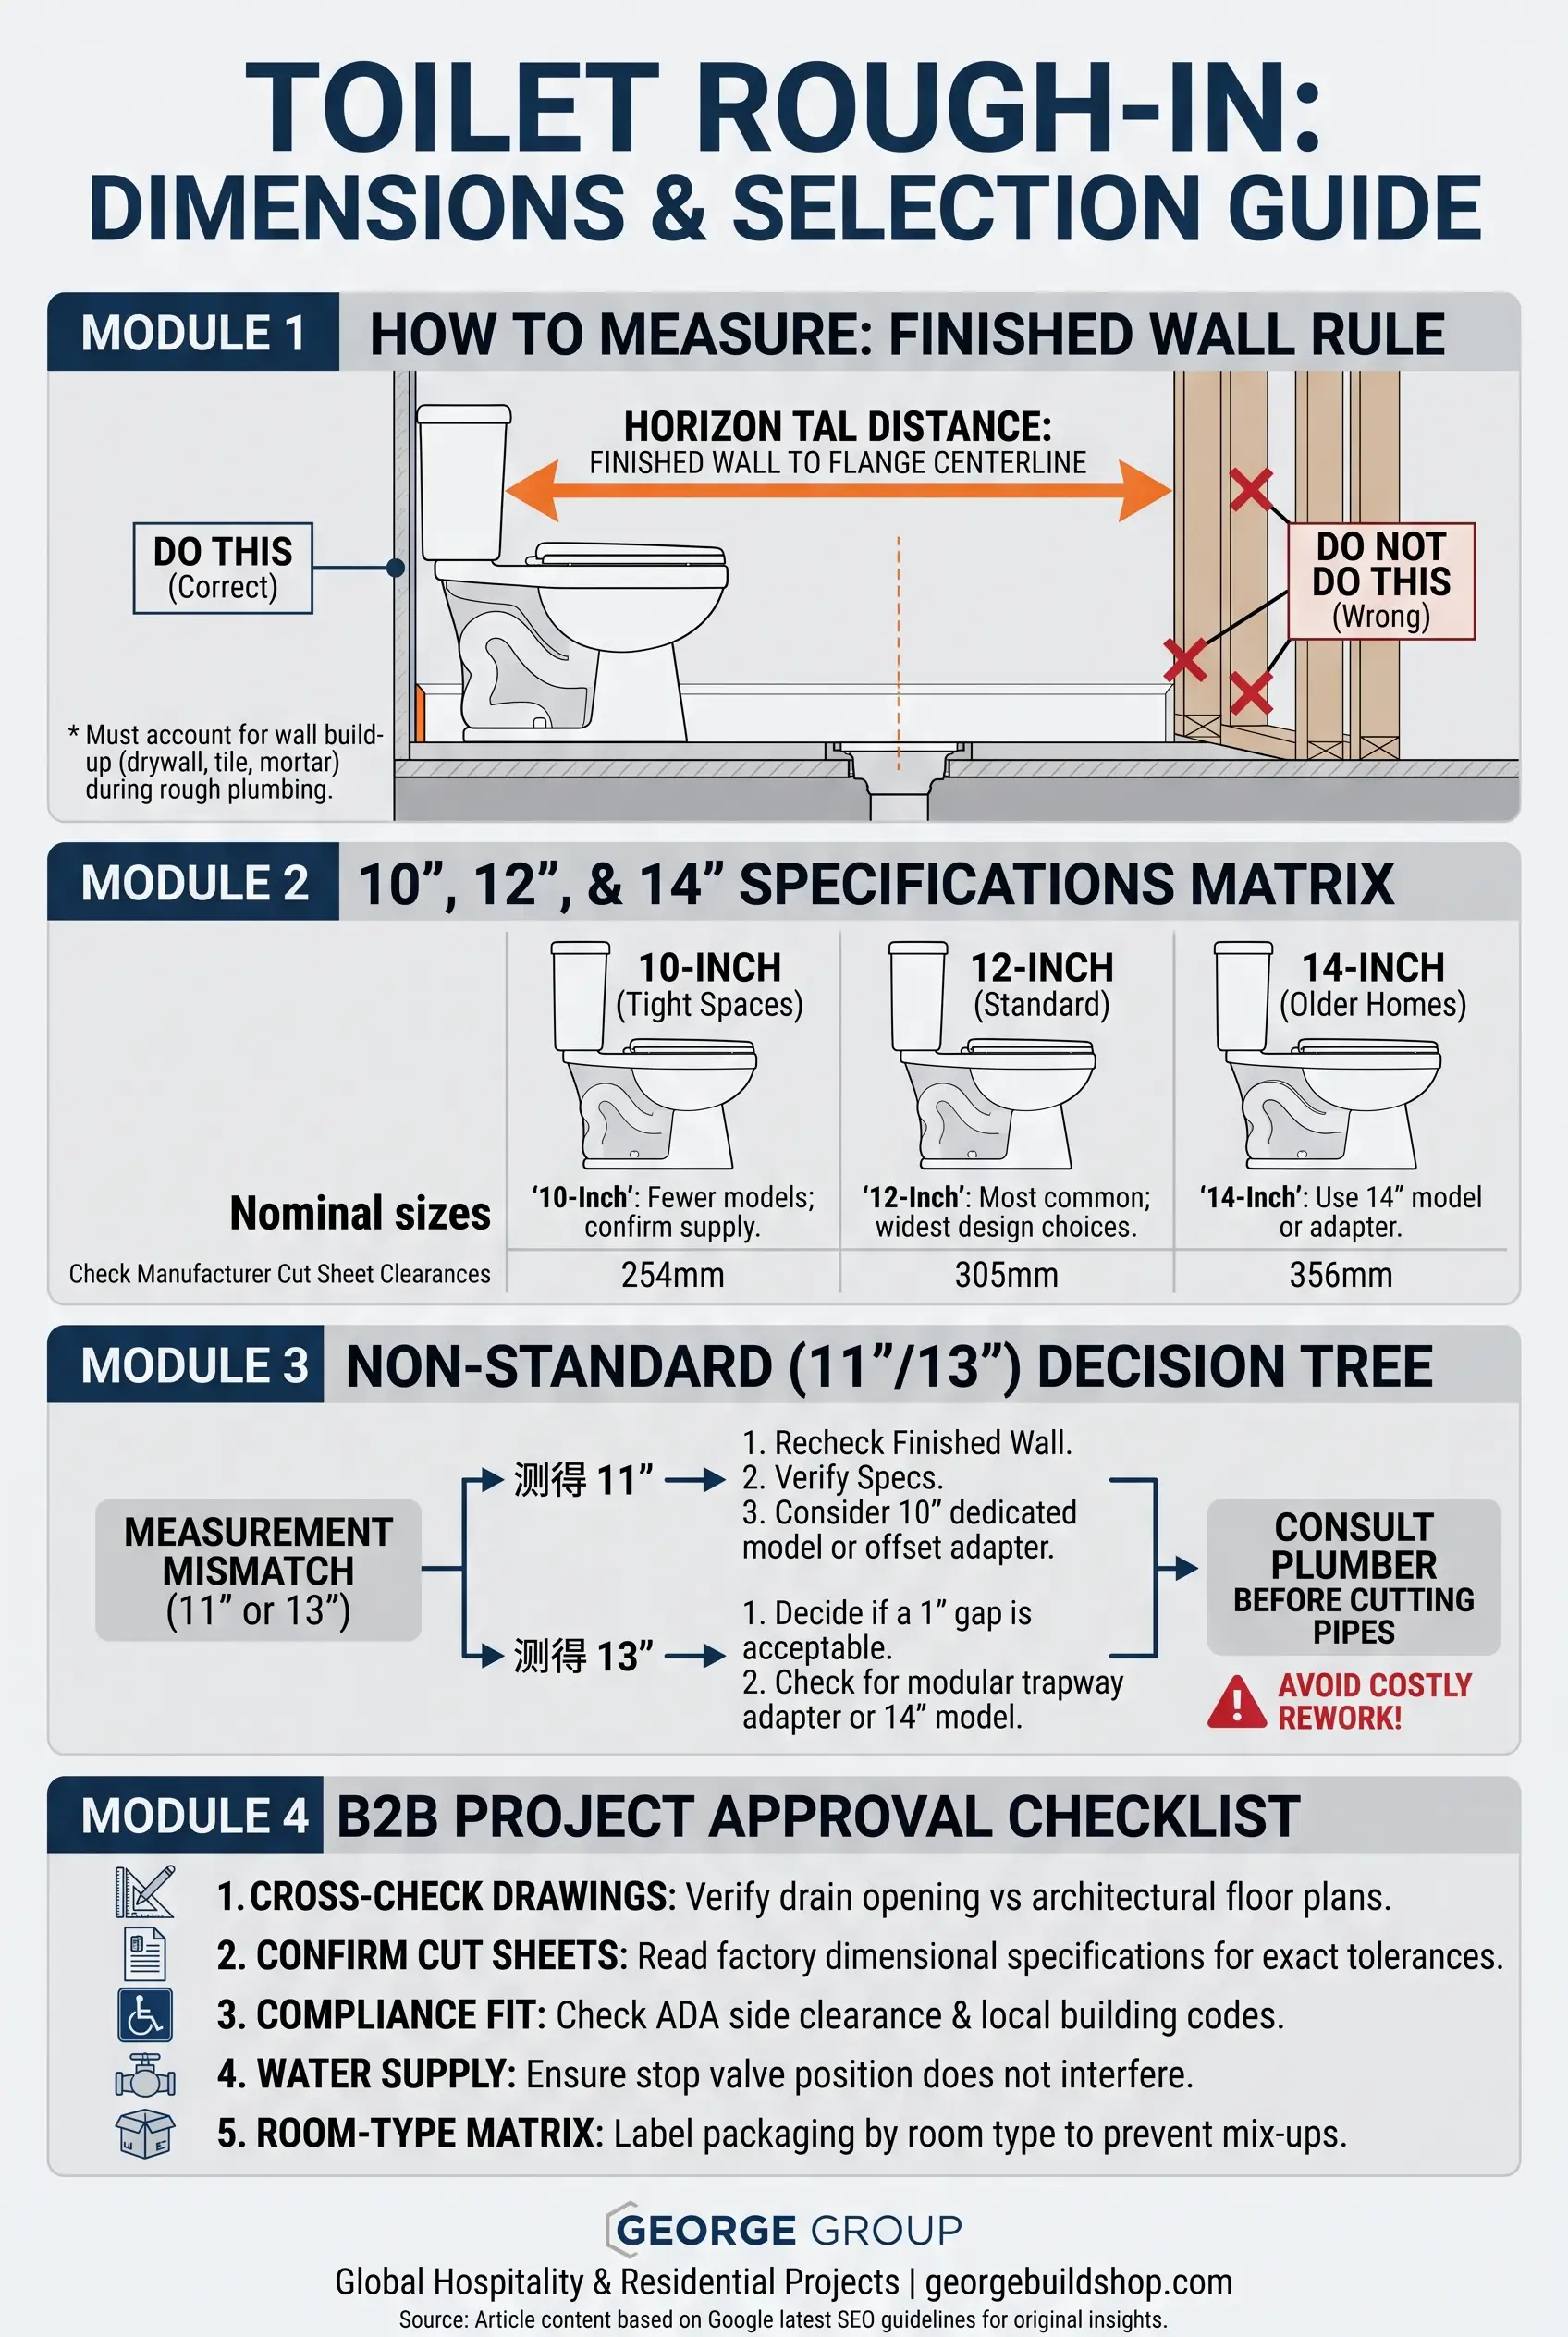
Toilet rough-in is the horizo ntal distance from the finished wall behind the toilet to the center of the floor drain outlet. The standard toilet rough in is 12 inches in North America, but 10-inch and 14-inch sizes also exist. You must match this measurement to your specific model.
Measuring your bathroom correctly takes only a few minutes, but guessing the size can ruin your entire renovation schedule. I have seen many project buyers make avoidable mistakes during plumbing rough-in work. Let us explore how toilet rough-in dimensions work and how you can select the right fixture every time.
What Is a Toilet Rough-In and Why Does It Matter?
Buying the wrong toilet size creates massive installation headaches when the base hits the back wall or sits awkwardly forward. Many builders order fixtures without checking the finished wall build-up, leading to expensive project rework. You need a clear understanding of this interface parameter to protect your budget.
Toilet rough-in is the distance used to position a toilet’s waste outlet relative to the finished wall. For a typical North American floor-mounted toilet, you measure from the finished wall behind the toilet to the centerline of the floor outlet or flange. 12 inches is the most common nominal size.
Source:
https://bigblue.atlantisuniversity.edu/how-to-measure-for-a-toilet-rough-in/
Rough-In Definition and Reference Points
You must always establish the exact reference point before taking any physical dimension on site. The toilet rough in size refers strictly to the measurement between the finished back wall surface and the center of the floor flange closet bolts. You must never measure from the baseboard, molding, or unfinished wall framing studs.
In my factory work, I have seen project teams confuse framing dimensions with finished surface dimensions. A specification sheet cut sheet defines how the ceramic fixture aligns with your completed plumbing line. When your contractor and purchasing team use the same cut sheet reference points, your fixtures will install without any physical interference.
Rough-In vs Toilet Clearance
You must distinguish the nominal rough-in from overall bathroom clearance requirements. Toilet rough-in measures only the distance from the rear finished wall to the drain centerline. It does not define side clearance, front passage clearance, or toilet seat height. You must evaluate each spatial factor independently during your planning phase.
Accessible bathroom standards introduce separate dimensional rules for commercial projects. ADA standards require a 16 to 18-inch centerline distance from the side wall for wheelchair-accessible water closets. This side measurement is completely distinct from your 10, 12, or 14-inch rear rough-in, and both dimensions must comply with local building codes.
In my experience, a toilet rough in is an engineering interface between the building drainage and the ceramic fixture. You should never treat it as just a product dimension. A 12-inch rough-in fixture from one brand can have different tank clearances than a model from another brand. Always check the manufacturer specification sheet.
How Do You Measure a Toilet Rough-In Correctly?
Inaccurate bathroom measurements lead to returned fixtures, delayed plumbing inspections, and unexpected installation costs. Many homeowners measure from the baseboard instead of the finished wall surface, which throws off the whole layout. You can eliminate measurement errors by following a standard three-step process on your site.
For most floor-mounted toilets, measure horizontally from the finished wall behind the toilet—not the baseboard—to the center of the flange or closet bolts. This measurement gives you the nominal rough-in dimension. Compare this number against the manufacturer product cut sheet before you purchase any new unit.
Finished Wall to Flange Center
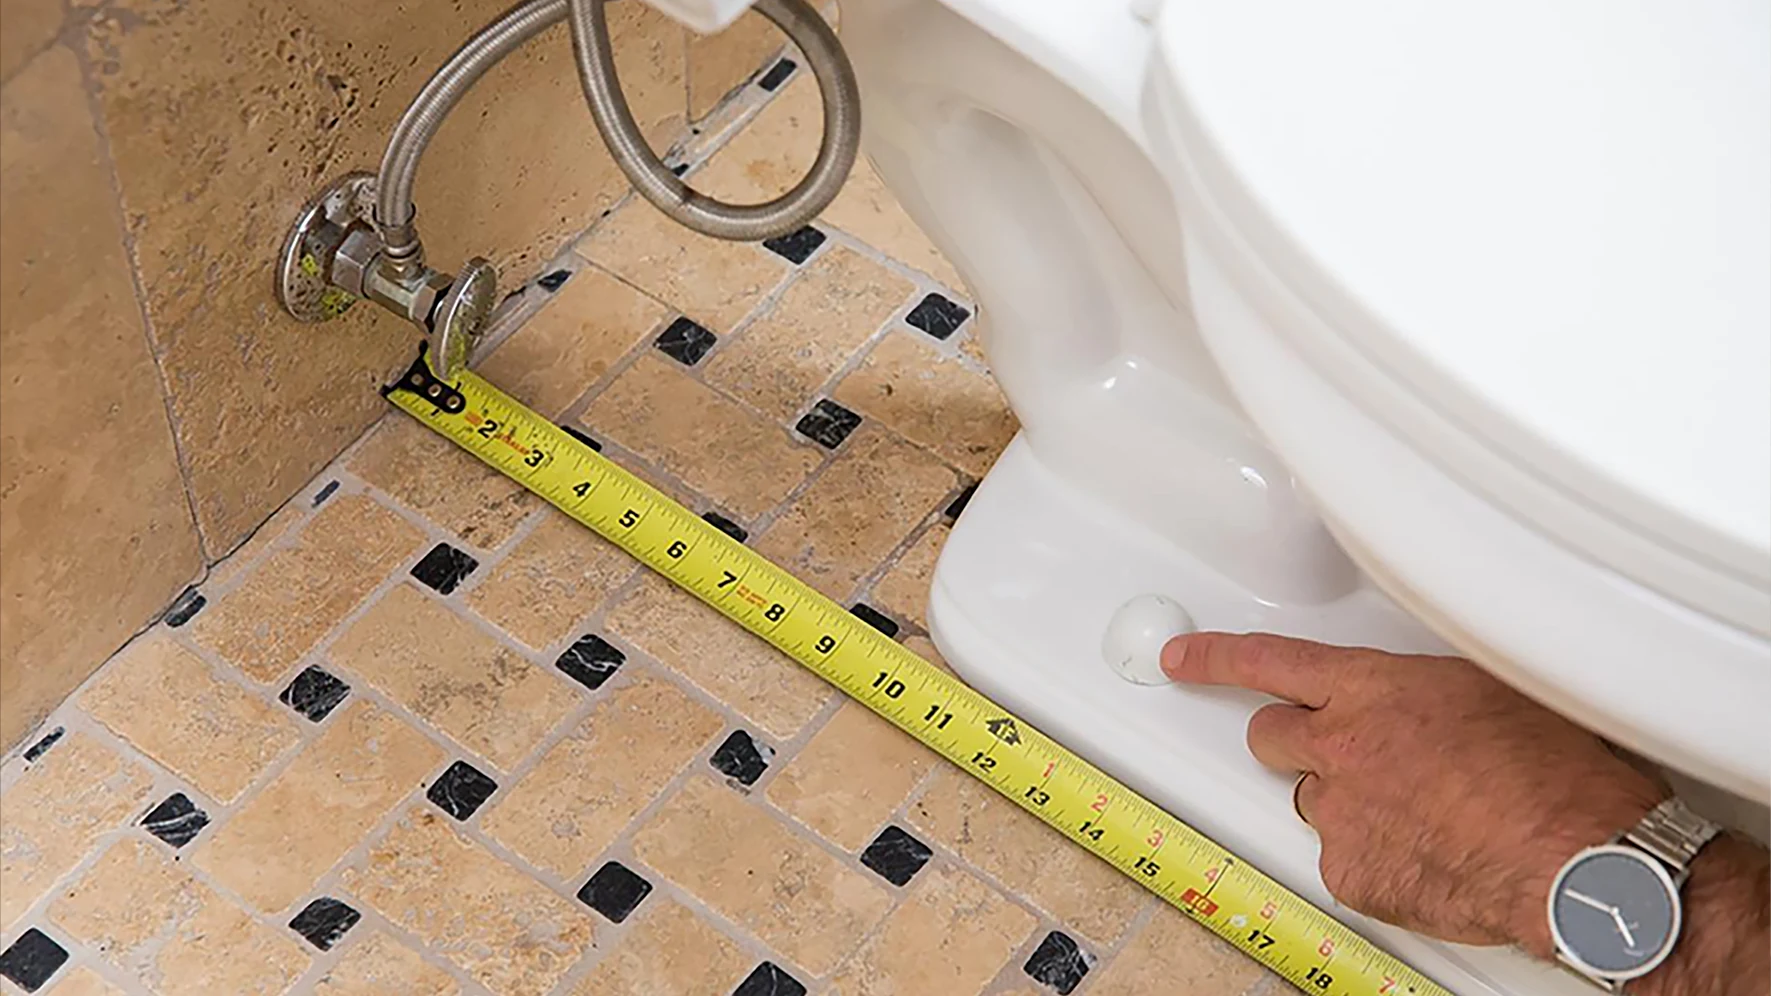
You can find your rough-in dimension by following three straightforward steps. First, locate the finished drywall or tiled wall surface behind your toilet. Second, find the center of the floor discharge flange or closet mounting bolts. Third, measure the horizontal distance in inches between these two points with a tape measure.
| Step | Action | Key Verification |
|---|---|---|
| Step 1 | Identify Finished Wall | Measure from tile or drywall surface, never the baseboard |
| Step 2 | Locate Flange Center | Find center of closet bolts or open waste pipe |
| Step 3 | Measure Horizontally | Pull tape measure straight to determine nominal size |
Measuring With the Toilet Still Installed
You do not need to remove an existing toilet to determine its rough-in dimension. Locate the plastic bolt caps on both sides of the toilet base that secure the fixture to the floor flange. Measure from the finished wall directly behind the bowl to the center of these bolt caps.
If your toilet has four floor bolts, measure to the center of the rear bolts. This measurement reveals whether you have a 10, 12, or 14-inch rough-in toilet bowl. You should also check the gap between the toilet tank and the wall to confirm your fixture has proper rear clearance.
Unfinished Walls and Wall Build-Up
Measuring during the rough plumbing phase requires extra care because the finished wall does not exist yet. You must account for the thickness of drywall, cement backer board, mortar, wall tiles, and decorative panels. Adding these layers after rough plumbing installation pushes the finished wall forward toward your drain flange.
For a single bathroom, a one-inch measuring error is an annoying installation problem. For 100 hotel guestrooms, that same error creates a major specification crisis across your entire project schedule. You must calculate total wall build-up thickness early so your plumber sets the drain flange at the exact required distance.
Site conditions often differ from original construction drawings during building renovations. When you measure an existing rough-in, always cross-reference your physical tape measurement with the approved architectural plans. Checking your finished wall build-up against the manufacturer cut sheet prevents expensive ceramic reorders and keeps your plumbing installation running on schedule.
Which Toilet Rough-In Size Fits: 10, 12 or 14 Inches?
Choosing the wrong toilet size will leave your bathroom with an unusable fixture or an ugly wall gap. Builders often assume all toilets share identical dimensions, leading to unexpected delivery rejections. You can avoid wasted money by understanding how 10, 12, and 14-inch rough-in sizes perform in practice.
| Rough-In | Typical Meaning | Selection Rule | Project Note |
|---|---|---|---|
| 10-Inch | Outlet closer to back wall | Choose model approved for 10″ | Fewer models available; confirm supply early |
| 12-Inch | Most common nominal size | Widest model and design choices | Verify manufacturer cut sheet clearances |
| 14-Inch | Outlet farther from back wall | Use 14″ model or approved adapter | 12″ toilet creates noticeable rear gap |
10-Inch Rough-In Toilets
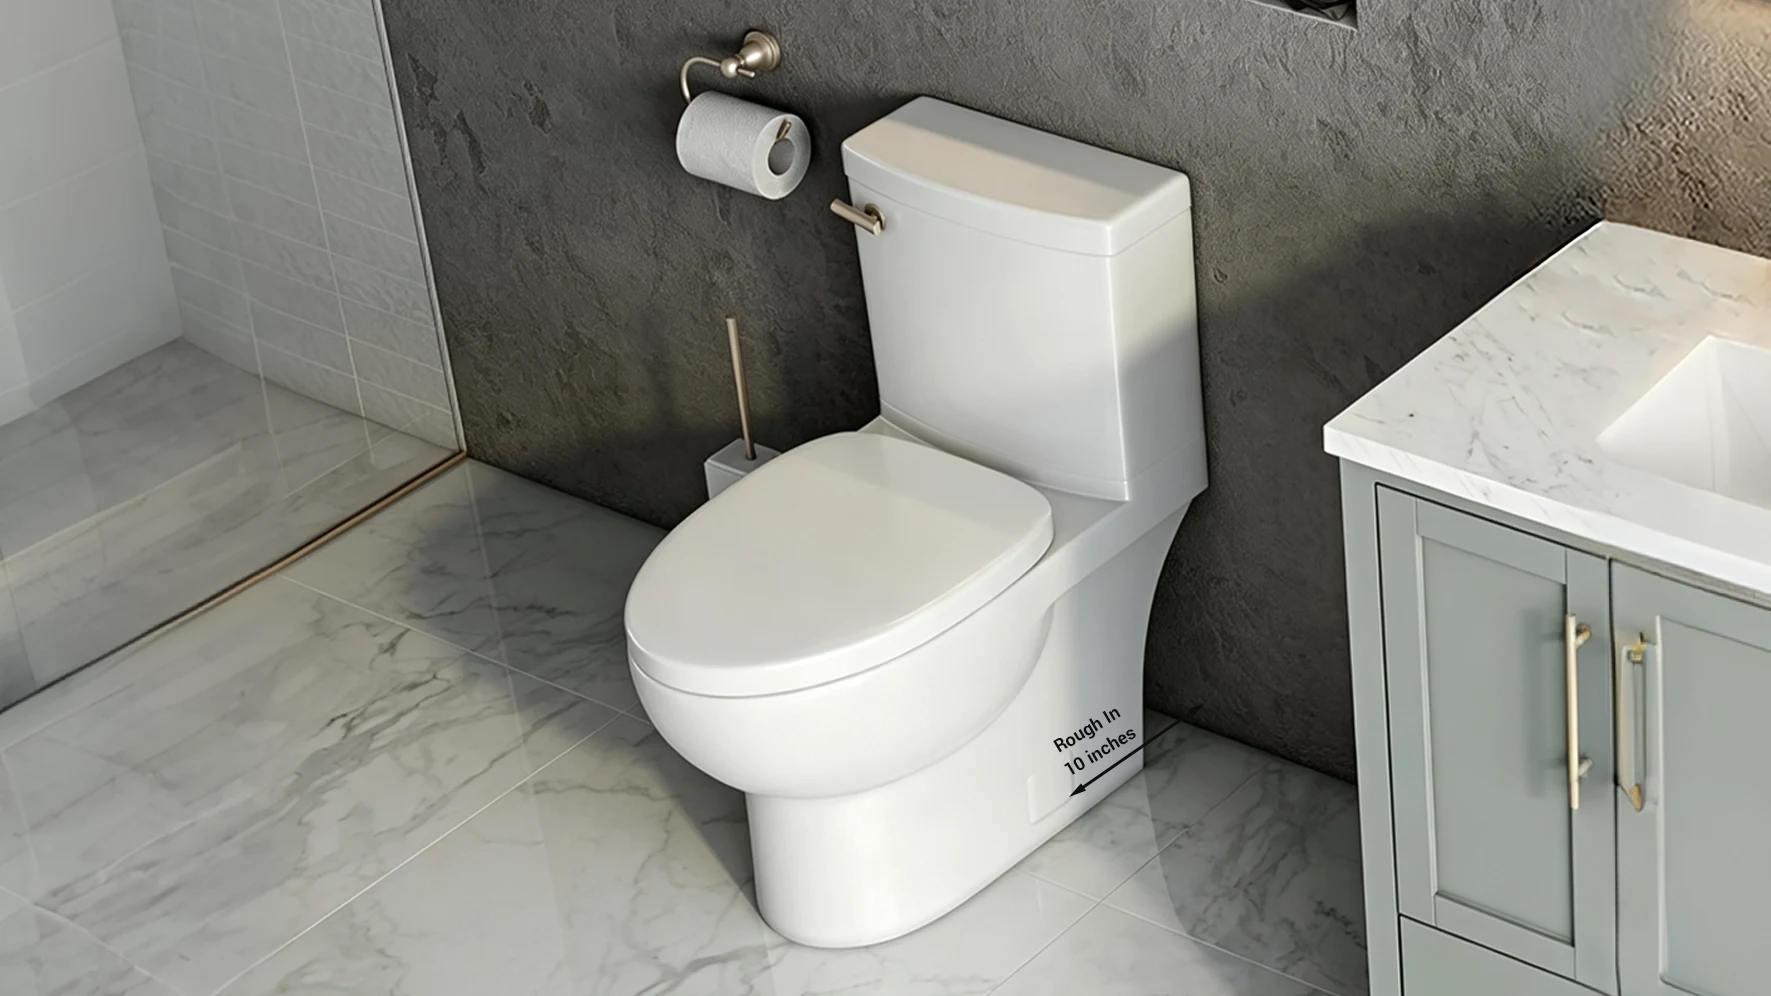
A 10 inch rough in toilet is designed for tight spaces where the floor drain sits unusually close to the wall. This size is common in older homes, basement renovations, and compact urban apartments. Because manufacturers produce fewer 10-inch models, you should confirm product availability, pricing, and factory lead times before finalizing your order.
When managing large hospitality projects, sourcing 10-inch fixtures requires advance planning. If you need replacement bowls in the future, specialized sizes can take longer to deliver than standard stock. You should always select a reliable manufacturer who maintains consistent production lines for 10-inch ceramic bowls and matching tank components.
12-Inch Rough-In Toilets
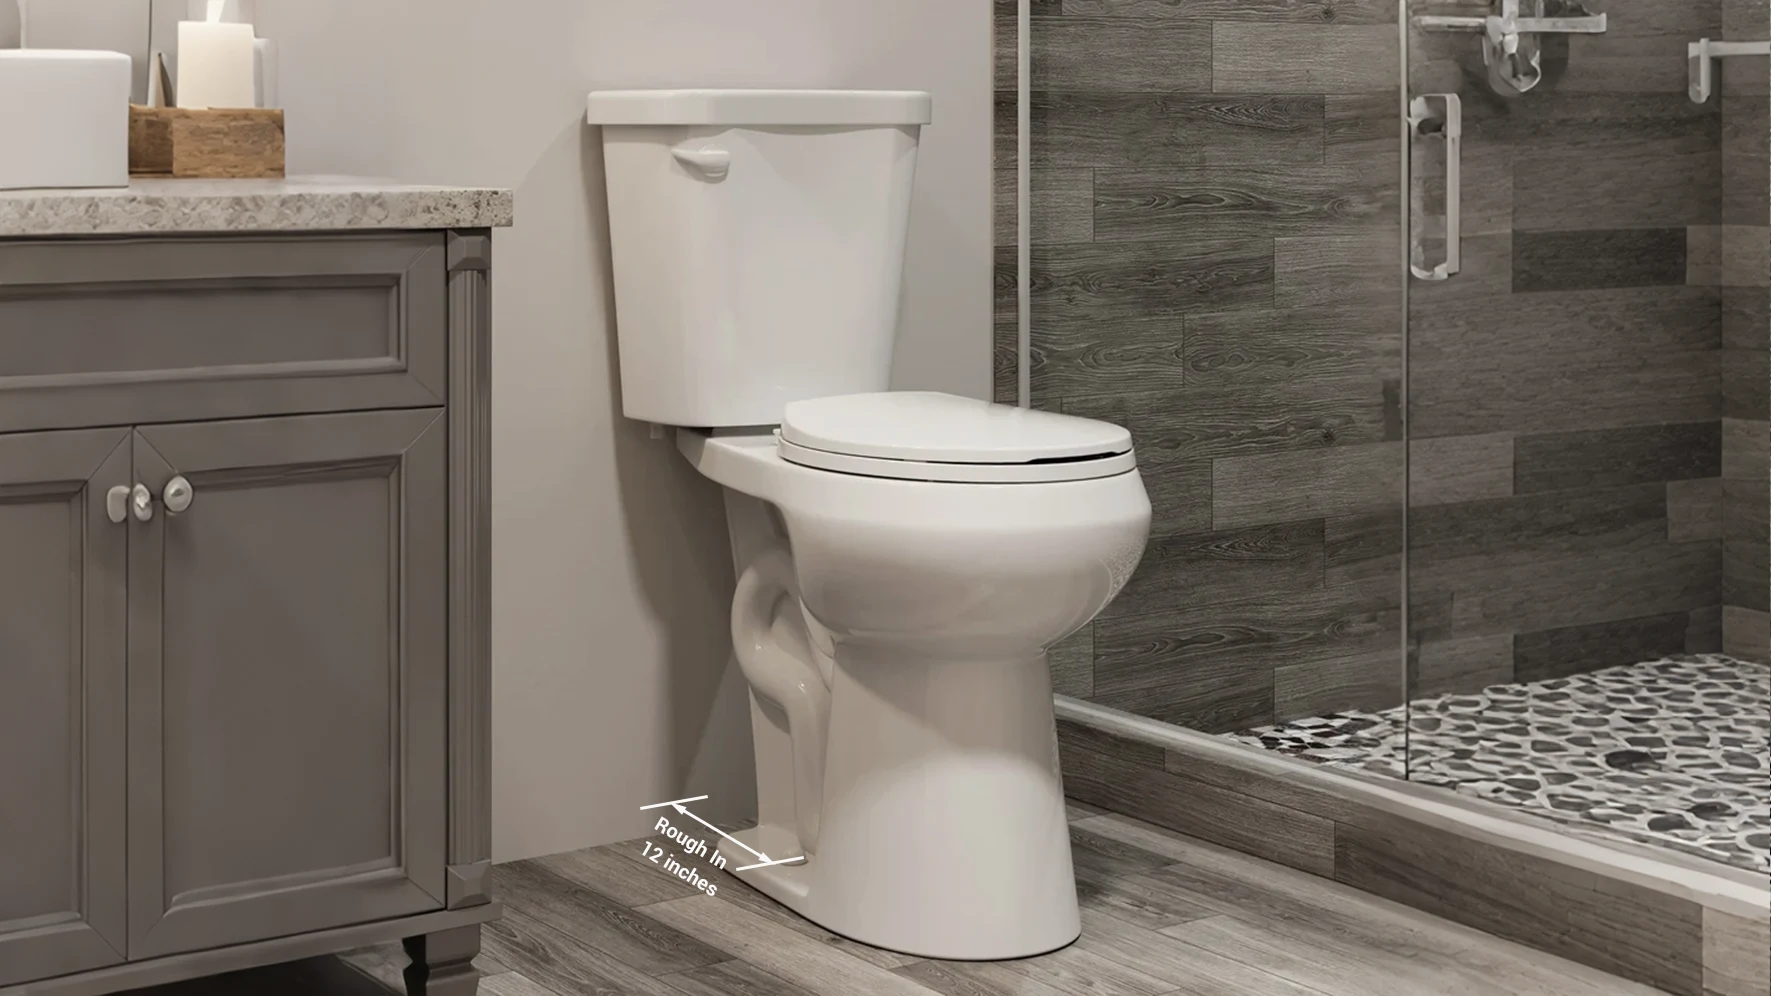
A toilet 12 inch rough in represents the standard configuration across modern residential and commercial construction in North America. This standard toilet rough in offers the widest variety of bowl shapes, smart bidet features, and skirted trapway designs. Most builders default to this size for standard residential developments and hotel guestrooms.
However, two different 12-inch models may have completely different external footprints. Even with identical rough-in dimensions, variations in water supply stop locations, tank thickness, and overall projection can impact your room layout. You must review the detailed product dimensional drawings to ensure the toilet fits comfortably within your bathroom space.
14-Inch Rough-In Toilets
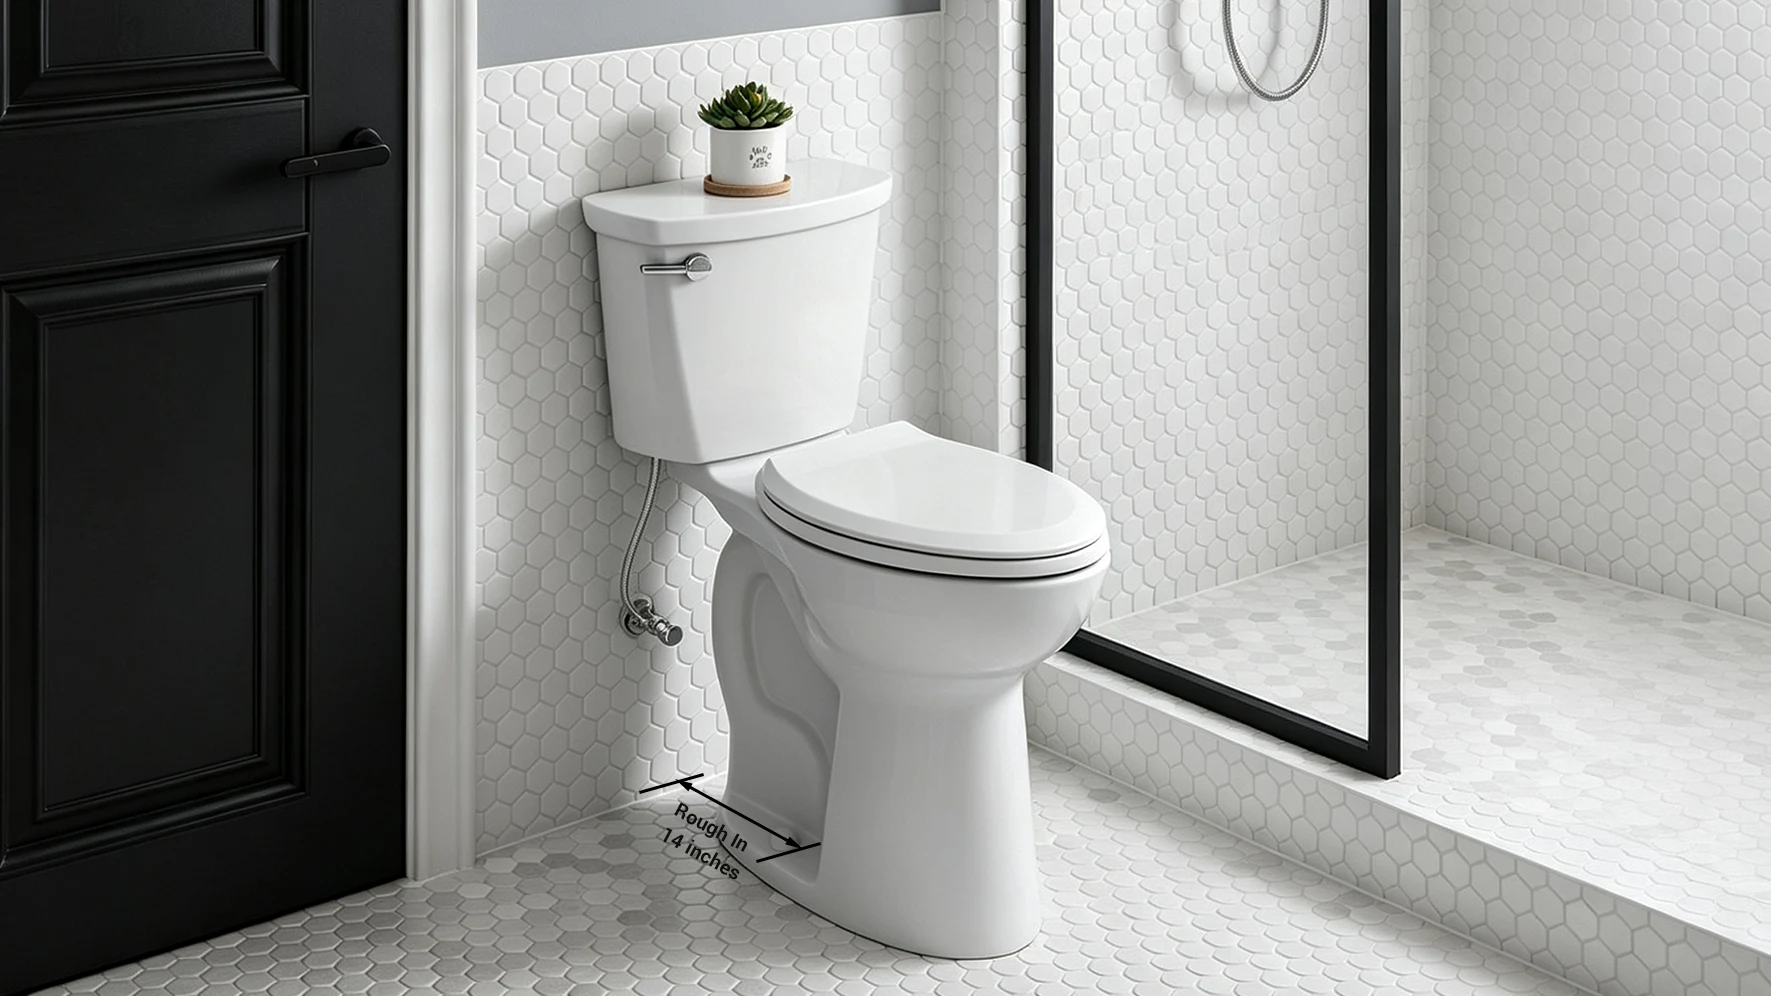
A toilet 14 inch rough in accommodates bathrooms where the waste pipe was set farther out from the wall. This rough-in dimension frequently appears in historic properties or custom architectural designs. Installing a standard 12-inch toilet on a 14-inch rough-in creates an awkward two-inch gap behind the ceramic tank.
Some modern toilet systems utilize modular trapway adapters that allow a single bowl to adapt to 10, 12, or 14-inch rough-in installations. You should check the manufacturer cut sheet rather than assuming any standard toilet will work. An approved adapter kit preserves aesthetic appeal while maintaining proper waste siphon performance.
Selecting between 10, 12, and 14-inch rough-in sizes is about system compatibility rather than finding the best overall toilet. You must verify whether your selected model uses a dedicated ceramic casting or an adjustable trapway adapter. Checking factory cut sheets early ensures your chosen fixture aligns perfectly with your site conditions.
What If the Toilet Rough-In Is 11, 13 or Does Not Match?
Discovering an unexpected 11-inch or 13-inch rough-in measurement can halt your renovation progress and cause major stress. Many contractors try to force a standard fixture into an irregular opening, causing cracked porcelain and broken flange seals. You can solve non-standard rough-in problems safely by following structured engineering steps.
Do not round an 11-inch or 13-inch measurement automatically to the nearest standard rough-in size. Check the exact toilet specification sheet and available rear clearance first before purchasing any fixture. You should evaluate manufacturer installation tolerances to confirm whether the specific model can accommodate your unique site dimension safely.
Nominal Size vs Actual Model Fit
A 12-inch toilet is a nominal specification category rather than a rigid fixed dimension across all brands. Some manufacturers design their tanks with an integrated one-inch rear gap, allowing a 12-inch model to fit an 11.5-inch rough-in opening. Other skirted models feature zero back clearance and will not install if your rough-in is short.
In our production testing, ceramic shrinkage during kiln firing can also affect final exterior dimensions by a few millimeters. You should never assume two 12-inch models have identical installation tolerances. Always read the manufacturer technical cut sheet to verify the minimum distance required from the flange center to the rear tank edge.
Decision Order for a Mismatch
When you encounter an irregular rough-in measurement on site, you should follow a systematic engineering decision order. Do not immediately cut floor pipes or force standard fixtures into non-matching spaces. Instead, execute this six-step evaluation process to find the most cost-effective and structurally sound solution:
- Recheck your physical measurement from the finished wall surface.
- Confirm the final wall tile and backer board thickness.
- Check the exact approved manufacturer product cut sheet.
- Check if the manufacturer offers an alternative rough-in kit.
- Review water supply valve clearance and door swing paths.
- Assess physical plumbing modifications with your project plumber.
Why a Small Error Becomes a Large Project Problem
For one bathroom, a rough-in mismatch is an installation problem. For 100 repeated hotel guestrooms, it becomes a severe project cost and schedule crisis. A single measurement error repeated across multiple units requires emergency toilet replacements, drain relocations, and expensive tile rework that destroys your construction timeline and budget.
Commercial plumbing projects rely on strict adherence to approved shop drawings. When sub-contractors install floor drains without verifying fixture cut sheets, the entire project faces delayed building handovers and costly material returns. Locking down verified rough-in dimensions before placing bulk factory orders protects developers from massive unforeseen project expenses.
Handling non-standard rough-in dimensions requires verified physical evidence rather than optimistic assumptions. You should never rely on quick fixes like offset flanges without engineering approval, as offset fittings can increase drain clog risks. Reviewing dimensional drawings with your supplier before manufacturing ensures every fixture fits your plumbing layout smoothly.
How Should Projects Approve Toilet Rough-In Before Bulk Ordering?
Managing bulk bathroom procurement across multi-story apartments and luxury resorts requires zero-defect quality control. Approving plumbing orders based only on general model names frequently leads to site mismatches and delayed occupancy permits. Professional developers use a structured approval workflow to guarantee complete compatibility across every single room type.
Commercial project buyers must approve toilet rough-in specifications using verified manufacturer cut sheets, floor drainage drawings, and room schedules before manufacturing begins. This process ensures the ceramic fixture, floor outlet, water supply valve, and finished wall build-up integrate seamlessly across all residential and commercial building units.
Cut Sheet and Drawing Cross-Check
You must never approve commercial toilet orders based on nominal 12-inch descriptions alone. Your project team should cross-check every candidate fixture against approved architectural drawings. Reviewing all critical parameters on the product cut sheet guarantees that your ordered plumbing fixtures match your job site plumbing infrastructure perfectly.
- Waste outlet centerline and flange connection details
- Finished back wall reference line and rear gap
- Overall toilet projection into the bathroom walkway
- Ceramic pan width and side wall clearance
- Cold water supply stop valve position and elevation
- Mounting bolt configuration and floor anchor points
- Rim height for standard and accessible room compliance
Room-Type Approval Matrix
Large commercial developments feature multiple bathroom layouts that require distinct plumbing fixture specifications. You should organize your project requirements into a comprehensive room-type approval matrix. This matrix prevents installation mix-ups between standard guestrooms, ADA suites, and public commercial restrooms by assigning verified cut sheets to each distinct room category.
| Room Type | Toilet Model | Outlet Type | Rough-In / Setout | Approval Status |
|---|---|---|---|---|
| Standard Guestroom | Model A Floor-Mount | Floor Outlet | 12″ (305 mm) | Approved |
| Accessible Suite | Model B ADA Compliant | Floor Outlet | 12″ Rough-In + 18″ CL | Approved |
| Public Restroom | Model C Commercial Bowl | Floor Outlet | Per Cut Sheet | Pending Review |
North American Rough-In vs International Setout
Global construction projects use different dimensional standards and drainage terminology depending on the destination market. While North America uses 10, 12, and 14-inch rough-in dimensions, Australian and European markets specify S-trap and P-trap toilets using millimeters. You must never convert 12 inches to 305 mm and assume universal plumbing compatibility.
| Market / Region | Common Specification Language | Key Technical Focus |
|---|---|---|
| North America | 10″, 12″, 14″ floor rough-in | Flange centerline to finished wall |
| Australia / NZ | S-trap / P-trap setout (mm) | 140 mm to 335 mm variable setout range |
| Europe / Global | P-trap horizontal / S-trap floor | Wall outlet height and floor collar spec |
Accessibility and Project Compliance
Commercial procurement requires separating physical fit from building code compliance. Physical fit confirms whether the ceramic bowl connects to the floor flange without hitting the wall. Compliance fit verifies that the product carries required regional certifications such as cUPC, WaterSense, WaterMark, or CE markings for commercial building inspections.
Accessibility fit ensures that the installed fixture satisfies local accessibility laws, such as ADA standards in the United States. ADA compliance regulates the distance from the side wall to the toilet centerline, grab bar clearances, and seat height. You must verify all three compliance layers before approving bulk factory manufacturing.
George Project Approval Workflow
At George Group, we implement a rigorous seven-stage approval workflow for every hospitality and residential development project. Over the years, our professional team has served 1,000+ projects worldwide with a 98% on-time delivery rate, ensuring that all bathroom fixtures match site drawings perfectly before mass production.
- Review project BOQ and architectural floor plans.
- Identify waste outlet types and rough-in setout.
- Match candidate models with dimensional shop drawings.
- Flag dimensional mismatches before starting production.
- Lock approved technical cut sheets by room type.
- Enforce strict factory IQC and OQC inspections.
- Label packaging clearly by room type.
Bulk fixture procurement succeeds when you treat plumbing fixtures as engineered components within a complete building system. Standardizing your specification approval process prevents unexpected delivery surprises and expensive site modifications. Working directly with an experienced manufacturing partner ensures your project receives fully compliant, precision-crafted bathroom fixtures on schedule.
What Are the Most Common Toilet Rough-In Questions?
What is a standard toilet rough-in?
Are all toilets 12-inch rough-in?
What if my toilet rough-in is 11 inches?
Can a 12-inch rough-in toilet replace a 10-inch toilet?
Can I use a 12-inch toilet on a 14-inch rough-in?
How do I know if I need a 10- or 12-inch rough-in toilet?
Is toilet rough-in measured from the finished wall?
Does toilet rough-in size matter?
Conclusion
Understanding your toilet rough in ensures seamless bathroom installation and prevents costly rework. Contact Helen at George Group at https://georgebuildshop.com/ today for factory-direct bathroom fixtures and dedicated project support.
Secure Your Project’s Success Today
Ready to eliminate installation risks? Whether you are building a boutique resort or a high-rise hotel, our engineering team is ready to review your BOQ. Fill out the form below to get factory-direct pricing, custom bathroom solutions, and verified rough-in compatibility.