Floating bathroom vanity installation can look simple at first, but how to install a floating vanity correctly starts long before the cabinet reaches the site. If buyers ignore wall support, plumbing, and drawer clearance, the final floating vanity installation cost can become much higher through rework.
A floating bathroom vanity installation should be planned by confirming wall structure, blocking, plumbing rough-in, P-trap clearance, drawer layout, finished countertop height, ADA needs, and production drawings before bulk manufacturing. For hotel, apartment, and resort projects, this should be treated as a supplier, contractor, and buyer coordination task.

In my project experience, most serious problems do not happen because the vanity is weak. They happen because the wall, pipe position, fixing height, or drawer space was not confirmed early enough. This is why I always ask buyers to review installation details before they approve production.
Table of Contents
What Type of Wall Is Needed for a Floating Sink?
A floating sink or wall-hung vanity puts real stress on the wall, especially in hotels and apartments. If the wall cannot carry the load safely, the vanity may loosen, sag, or create repair work after the rooms open.
A floating vanity needs a strong wall structure such as concrete, brick, reinforced stud framing, or a prepared light partition with blocking, backing board, steel frame, or other structural support. Drywall alone should not be used as the main load-bearing point.
Concrete and Brick Walls
Concrete and brick walls are usually better for floating vanity installation because they can hold proper anchors and fixing systems. I still check wall thickness, anchor type, pipe position, and drilling depth because a strong wall can still fail if the fixing method is wrong.
Light Steel or Wood Stud Walls
Light steel stud walls and wood stud walls need careful preparation before installation. I usually ask the contractor to confirm stud spacing, blocking height, backing board position, and screw specification, because the vanity must connect to structure, not only to surface board.
Drywall and Light Partition Walls
Drywall itself is not a safe main fixing point for a floating vanity. In many projects, the visible wall looks finished, but the hidden structure is not ready. This is why buyers should ask about backing support before approving the vanity design.
Expert pick
Hotel Floating Vanity →Supplied with full wall bracket specs and blocking guide — designed for commercial hotel and resort walls.
The cabinet weight is only one part of the load. The countertop, basin, water, hardware, and daily user impact also matter. Hotel guests do not always use products as carefully as homeowners, so I always suggest a higher safety margin for commercial rooms.
Do You Need Blocking for Floating Vanity?
Blocking is one of the most important hidden details in a floating vanity project. Many buyers only see the finished cabinet, but the real support depends on what is inside the wall before the vanity is installed.
Yes, most floating vanities need blocking or another reinforced support system, especially on light partition walls. Blocking should be planned by height, width, fixing point, screw type, hanger system, and pipe avoidance, not added casually at the site.
Blocking Height
Blocking height must match the final fixing height of the vanity. I always check this with the finished floor level, countertop thickness, cabinet height, and hanger position, because one wrong mark can change the final installed height in every room.
Blocking Width
Blocking width should cover the fixing area, not only the cabinet center. If the wall support is too narrow, the installer may have limited screw positions. This can create uneven stress on the vanity and make long-term use less safe.
Fixing Points and Hanger System
The fixing points must match the wall bracket or hanger system provided by the supplier. I do not treat blocking as a simple wood board. I treat it as part of the installation system between the wall, screws, bracket, and vanity body.
Pipe and Cable Avoidance
Blocking may be affected by drain pipes, hot and cold water pipes, electrical wires, or wall studs. This is a common site problem. If a main pipe blocks the fixing area, the supplier may need to adjust cabinet width, bracket position, or steel support.
For multi-room projects, the blocking standard must be the same across room types. If every worker prepares the wall differently, the vanity height and fixing strength will vary from room to room. This small hidden mistake can become a large installation problem later.
Case snapshot
320-room hotel renovation, Middle East
Different site crews set blocking heights without a shared reference. After 80 rooms, vanity heights varied by up to 25 mm across floors.
We issued a wall-fixing template with a single datum line from finished floor, matching the hanger bracket height — all crews used the same physical template for remaining rooms.
Zero height variation across the remaining 240 rooms. Client saved two weeks of rework and avoided re-tiling in affected areas.
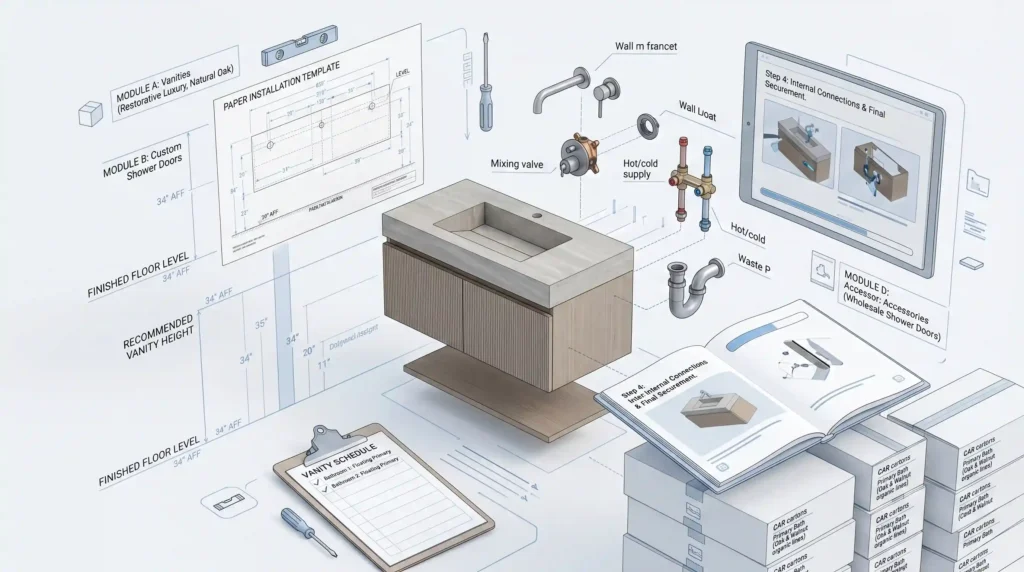
How Should Plumbing Rough-In Be Planned for a Floating Vanity?
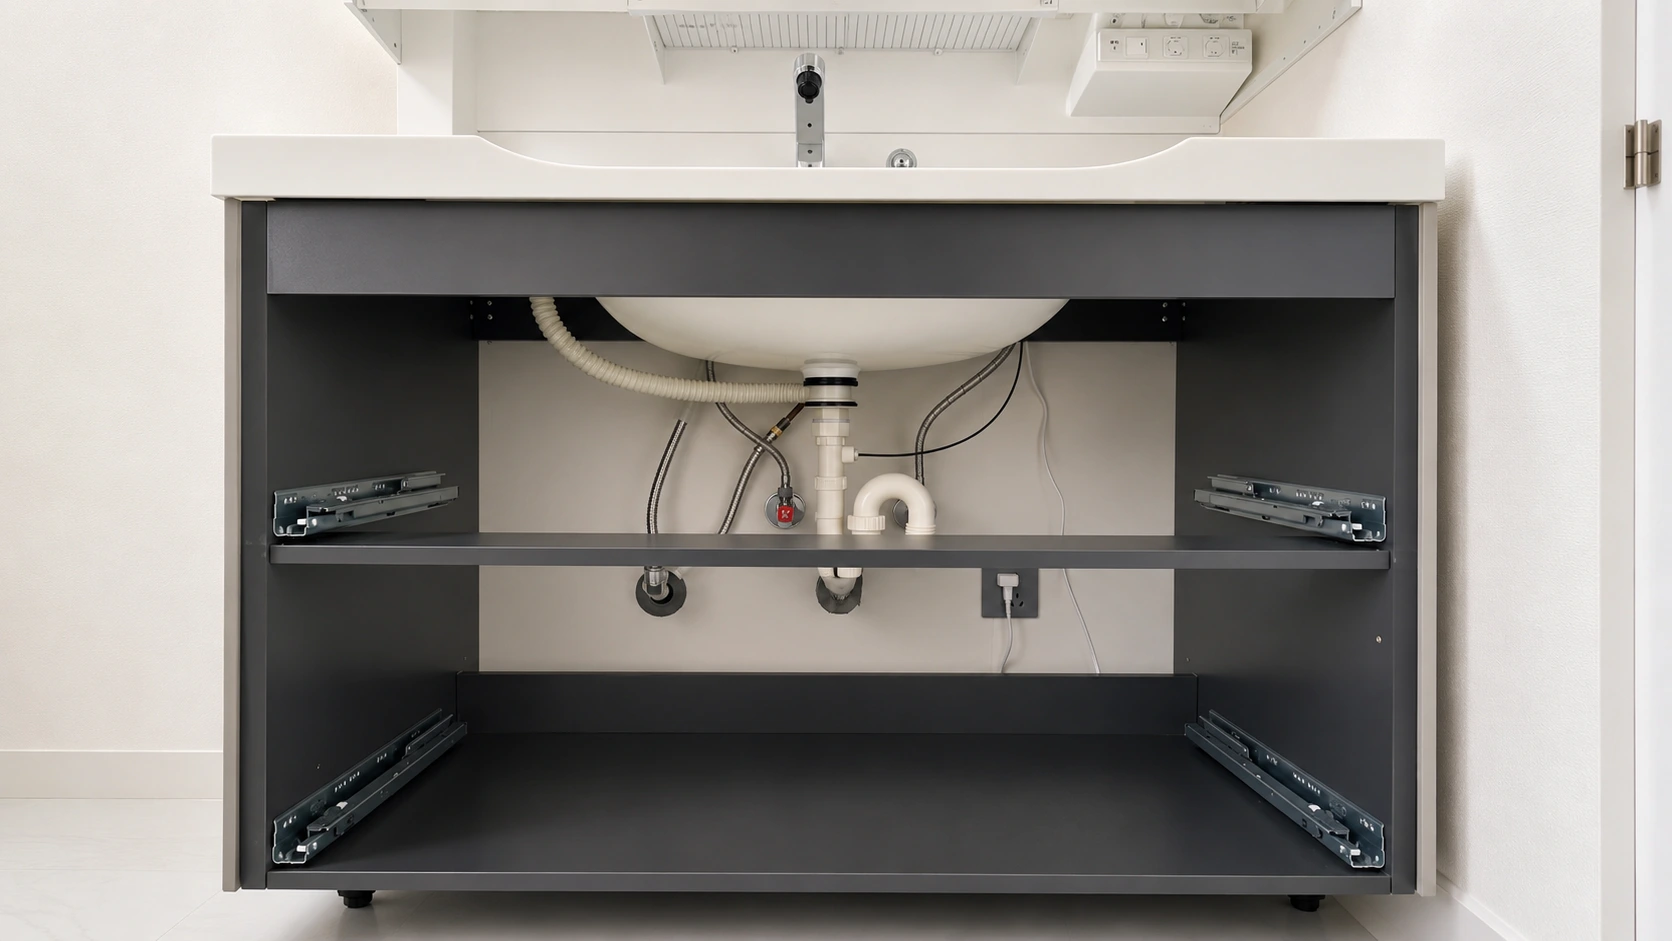
Plumbing rough-in is more visible on a floating vanity because the cabinet bottom is open. If the drain or water supply is placed too low, the pipe can appear under the cabinet and ruin the clean floating effect.
Floating vanity plumbing rough-in should be planned together with cabinet height, drawer structure, basin depth, P-trap location, wall drain or floor drain, and final countertop height. A supplier should provide a plumbing clearance drawing, not only a product size drawing.
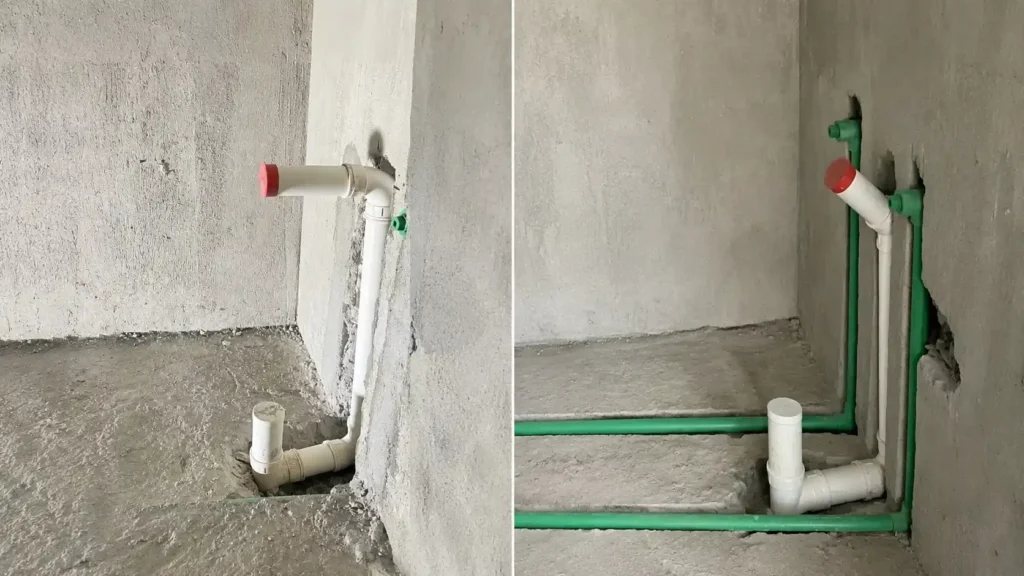
Drain Height
Drain height must work with the basin outlet and P-trap position. If the drain is too low, it may show below the cabinet. If it is too high, it may affect drawer space or force the installer to make poor site changes.
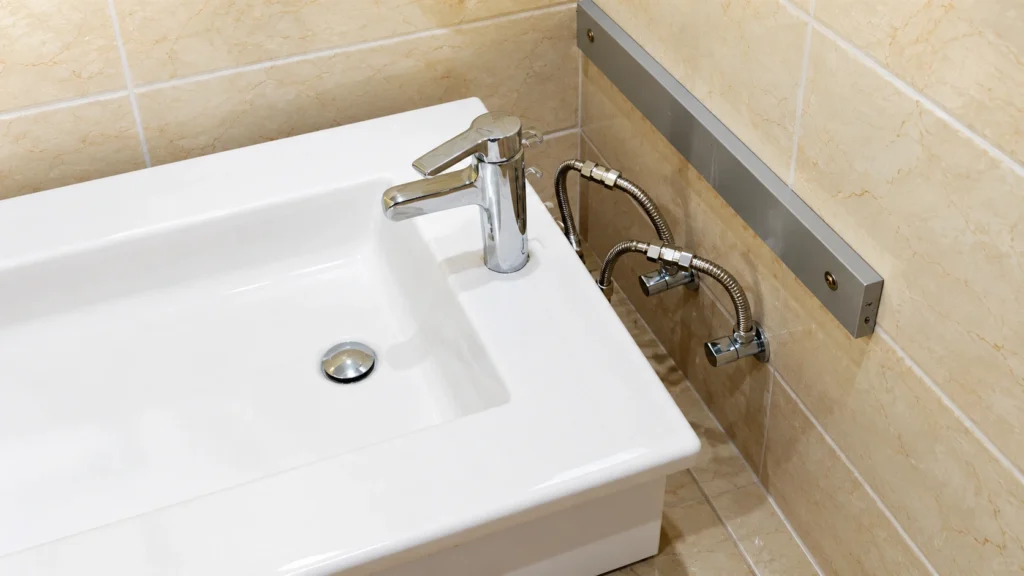
Water Supply Position
Hot and cold water supply positions should be checked with the back panel opening and drawer layout. I prefer clear centerline dimensions because installers need simple reference points, especially when they repeat the same work across many rooms.
Wall Drain or Floor Drain
Wall drain is usually cleaner for a floating vanity, but old buildings may already have floor drains or fixed pipe routes. For hotel renovation and apartment renovation, I always confirm existing pipe limits before recommending a floating design.
For project procurement, rough-in planning is not only a plumbing issue. It affects the cabinet design, drawer depth, production drawing, installation time, and final look. When buyers confirm this before placing the order, they reduce the risk of visible pipes and site rework.
How Can You Avoid P-Trap and Drawer Conflicts?
Many floating vanities use large drawers because buyers like clean lines and better storage. But the basin drain, P-trap, and wall drain can take away drawer space if the design team does not check the internal layout early.
To avoid P-trap and drawer conflicts, buyers should confirm the basin drain center, drawer inner layout, P-trap clearance, back panel opening, wall drain height, and water inlet position before production. This is much safer than cutting drawers on site.
Basin Drain Center Position
The basin drain center position should be confirmed before the drawer design is approved. If the drain shifts left, right, forward, or backward, the drawer cut-out may also need to change. I always check this before production drawings are signed.
Drawer Inner Layout
The outside of the drawer may look simple, but the inside must leave space for plumbing. Upper drawers often need a U-shaped cut-out. Lower drawers may need reduced depth if the P-trap or wall pipe is placed lower than expected.
P-Trap Clearance
P-trap clearance must include depth, height, and service access. If the P-trap hits the drawer, the installer may cut the drawer on site. This often damages the finish, changes the drawer strength, and creates different results across rooms.
Back Panel Opening
The back panel opening should match the rough-in location. I prefer a planned opening instead of random site cutting. A clean factory opening gives better appearance, better repeatability, and fewer arguments between the contractor and supplier.
Before production, I ask buyers to confirm the sink drain center, P-trap depth, drawer cut-out size, back panel opening, wall drain height, and hot and cold water inlet position. This simple checklist can prevent many repeated mistakes in hotel projects.
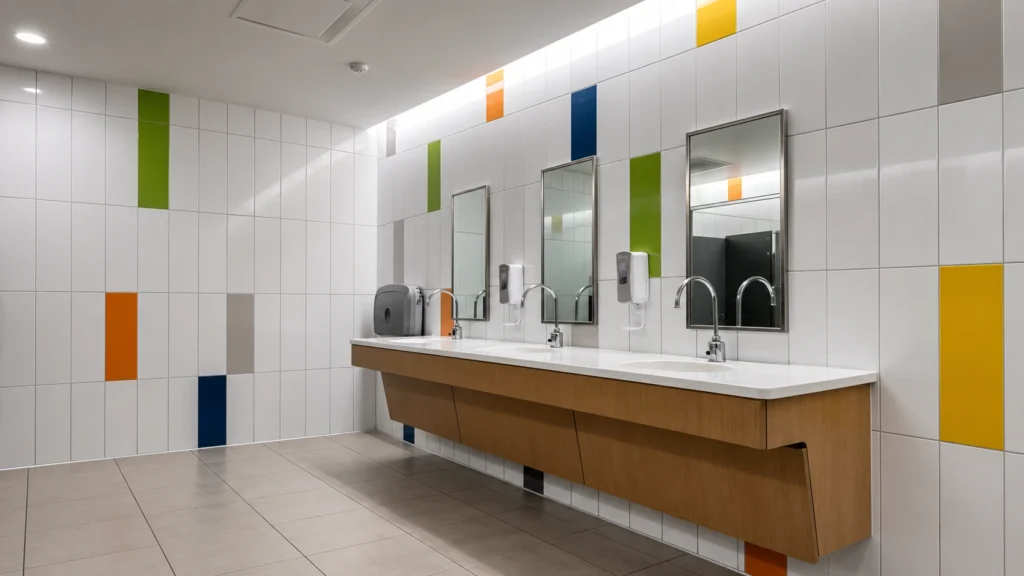
What Installation Height Should Be Used for Hotel, Apartment, and ADA Rooms?
Installation height should not be copied from one project to another without review. A hotel room, long-stay apartment, villa suite, and ADA room may have different user needs, code needs, and comfort requirements.
Floating vanity installation height should be confirmed by finished floor level, countertop thickness, basin type, guest comfort, local code, and ADA or accessibility room requirements. ADA rooms should be planned as separate room types, not just lower versions of standard rooms.
Finished Floor Level
Finished floor level must be clear before height is marked. Tile thickness, waterproof layer, and floor slope can change the final level. I always remind buyers that the installer should not measure from unfinished concrete and expect the final vanity height to be correct.
Countertop and Basin Type
Countertop thickness and basin type change the final user height. An under-mount basin, vessel basin, and integrated basin can create very different hand-washing positions. The cabinet height alone does not tell the full comfort story.
ADA and Accessibility Rooms
ADA and accessibility rooms need more than a lower countertop. The design may need forward approach space, knee and toe clearance, protected pipes, safe reach, and a basin depth that does not block access. Drawer structure may also need to change.
For public accommodation and commercial facilities, accessibility requirements should be checked early with the project team and local code consultant. I do not suggest using one standard vanity for all rooms if some rooms need ADA planning or special guest access.
How Can Contractors Keep Floating Vanity Installation Consistent Across Many Rooms?
Multi-room projects often fail because every installer makes a small different decision. One room may be perfect, while another room may have a different height, pipe opening, screw position, or visible gap.
Contractors can keep floating vanity installation consistent by using an installation template, room-by-room vanity schedule, fixing height mark, plumbing position reference, carton label by room type, installation manual, and mock-up room approval before bulk installation.
Installation Template
An installation template gives workers a simple way to mark fixing points and pipe openings. I like templates because they reduce guessing. They also make it easier to train different site teams to follow one shared standard.
Room-by-Room Vanity Schedule
A room-by-room vanity schedule helps the site team match each vanity to the right room type. This is important when the project has standard rooms, suites, apartment units, mirrored layouts, or ADA rooms with different cabinet and plumbing details.
Mock-Up Room
A mock-up room should be installed before mass production or mass installation when possible. Once the buyer, contractor, and supplier approve the sample room, the same dimensions and details can be repeated with much lower risk.
For hotels and apartments, a mock-up room is often cheaper than late rework. It helps the team check wall support, plumbing location, drawer movement, countertop height, cleaning access, and visual finish before dozens or hundreds of rooms are affected.
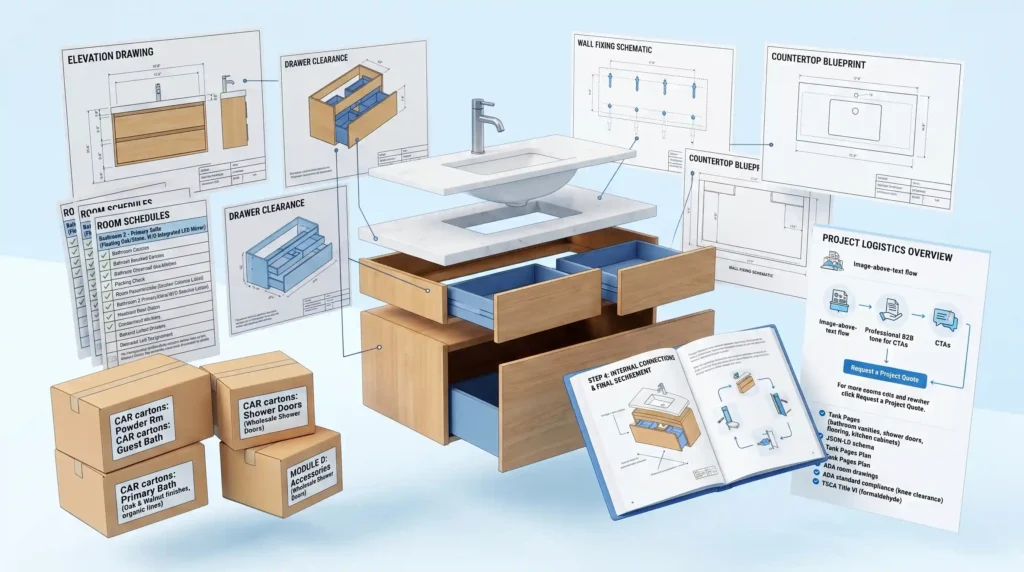
What Drawings Should Buyers Confirm Before Bulk Floating Vanity Production?
Project buyers should not order floating vanities only from renderings or product photos. A beautiful effect image cannot show wall support, pipe clearance, drawer conflicts, installation height, or different room type requirements.
Before bulk floating vanity production, buyers should confirm vanity elevation drawings, side section drawings, wall fixing drawings, plumbing rough-in drawings, countertop and basin drawings, drawer clearance drawings, ADA room drawings if required, and packing labels with room schedules.
Vanity Elevation Drawing
The vanity elevation drawing shows the front view, overall size, door and drawer layout, basin position, and visible design. I use this drawing to confirm the buyer’s design intent before going deeper into technical details.
Side Section Drawing
The side section drawing is very important because it shows depth, basin drop, drawer clearance, countertop thickness, and pipe space. Many problems are hidden in the side view, not in the front view.
Wall Fixing Drawing
The wall fixing drawing should show bracket position, screw point, support height, and wall preparation needs. This drawing helps the contractor prepare blocking or steel support before the finished wall is closed.
Plumbing Rough-In Drawing
The plumbing rough-in drawing should show wall drain height, water inlet position, centerline dimensions, and clearance space. This drawing connects the vanity supplier’s design with the plumber’s site work.
Packing Label and Room Schedule
Packing labels and room schedules help the site team place the correct vanity in the correct room. This matters when one project has different sizes, finishes, handed layouts, and accessibility rooms.
In my own projects, I prefer to solve details on drawings, not at the jobsite. Once bulk production starts, every unclear detail can become repeated in many units. Clear drawings protect the buyer, contractor, installer, and supplier at the same time.
Conclusion
Floating vanity planning should start before production. At georgebuildshop, I share practical bathroom vanity knowledge to help buyers, contractors, and project teams reduce installation risk.
Ready to get started?
Tell us your room count, wall type, and layout — we'll handle the rest.
From wall bracket specs and plumbing clearance drawings to ADA room planning and labeled carton schedules — we coordinate every detail before your bulk order goes into production.
↓ Fill in your project details below