Most buyers search for floating bathroom vanity dimensions and get a list of numbers with no context. They pick a size, place the order, and then face installation problems on-site. Here is what you actually need to know.
Standard floating bathroom vanity dimensions range from 24 to 72 inches wide, 18 to 24 inches deep, and 18 to 24 inches tall for the cabinet body. Most are mounted so the countertop sits at 32 to 36 inches from the floor. The right size depends on room size, plumbing location, and project type.
I have helped many hotel and apartment buyers go through this process. The number on the spec sheet is rarely the whole story. If you want a floating vanity bathroom installation that works across many rooms, you need to understand what those numbers actually control — and what they do not tell you.
Table of Contents
What Are the Standard Floating Bathroom Vanity Dimensions?
Many buyers receive a drawing with one number — say, 36 inches — and assume that covers everything. It does not. Without depth, height, and mounting position, that number means very little on site.
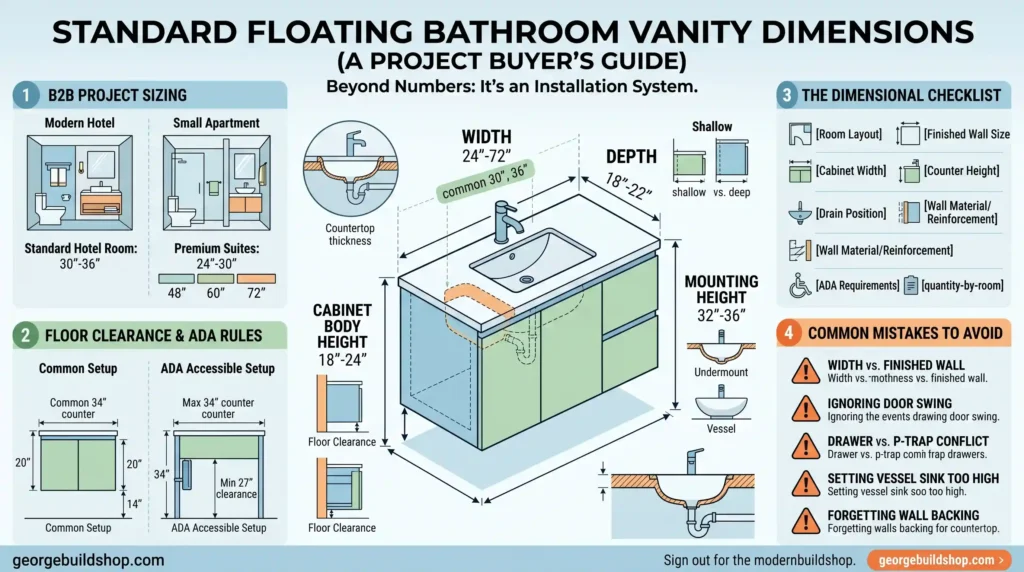
Floating bathroom vanity dimensions are defined by four measurements: width, depth, cabinet body height, and mounting height. Common widths run from 24 to 72 inches. Depth is usually 18 to 22 inches. Cabinet body height is 18 to 24 inches. Mounted countertop height is typically 32 to 36 inches from the floor.
Width
Width is the most visible dimension. A floating vanity bathroom 30 inch wide fits most standard hotel rooms and small apartments. A floating bathroom vanity 24 inch wide works in tight en-suite bathrooms. Larger suites and premium apartments often use 48, 60, or 72-inch vanities.
Depth
Standard depth runs from 18 to 22 inches. Shallower cabinets — around 18 inches — work better in narrow bathrooms. Deeper cabinets at 21 to 22 inches give more countertop space and sink room. Going beyond 22 inches is uncommon and may block door swing or toilet access.
Cabinet Body Height
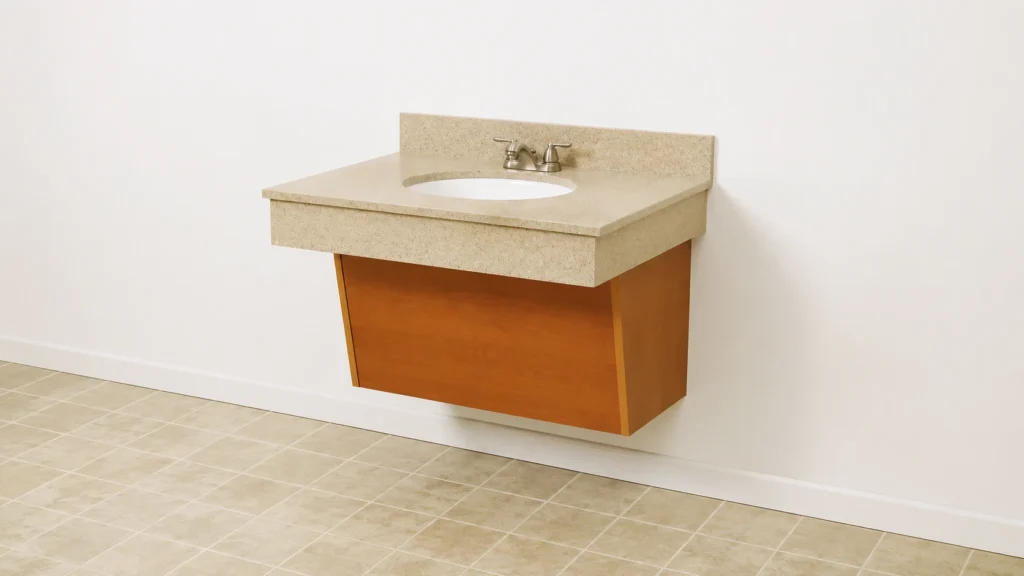
The cabinet body itself — not including the countertop — is usually 18 to 24 inches tall. This number directly affects how much floor clearance you get below the vanity, which matters for cleaning, plumbing, and ADA access.
Mounting Height
Most floating vanities are installed so the finished countertop sits at 32 to 36 inches above the floor. The exact mounting height depends on the countertop thickness and sink type. This number must be set before installation, not after.
Floating vanity dimensions are not just about the cabinet itself. They connect to countertop thickness, sink bowl depth, drain position, and the wall behind the cabinet. A dimension mistake on any one of these points can cause a visible gap, a blocked drawer, or a pipe that has no room to run.
How Much Space Should Be Under a Floating Vanity?
Buyers often ask about floor clearance as if it is a single fixed number. It is not. The space under a floating vanity is the result of three measurements working together, and changing one changes all the others.
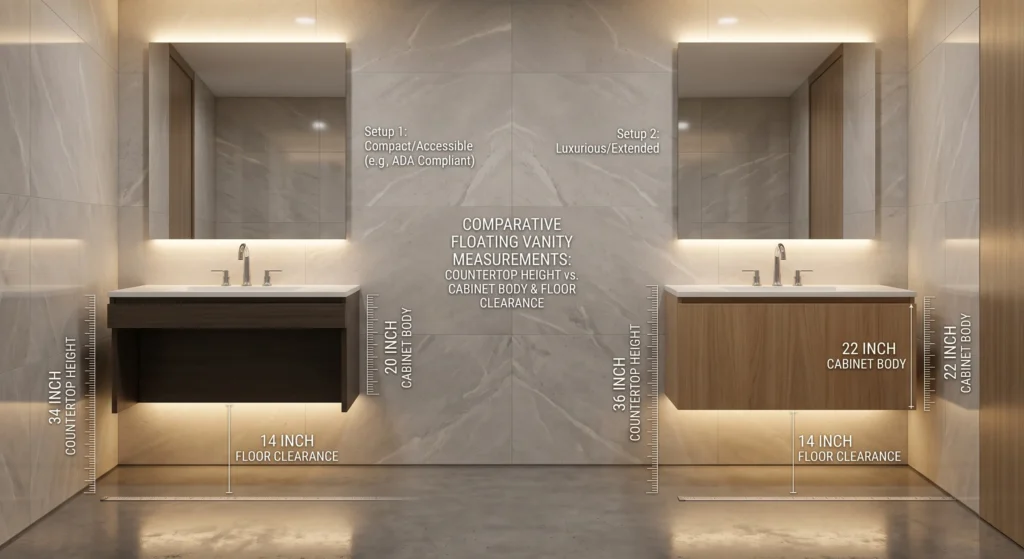
The space under a floating vanity depends on the countertop height, the cabinet body height, and the bottom clearance. A common setup uses a 34-inch countertop height with a 20-inch cabinet body, leaving 14 inches of floor clearance. Another setup uses a 36-inch countertop with a 22-inch cabinet body, also leaving 14 inches.
Countertop Final Height
This is the target height from the finished floor to the top of the countertop. Most projects use 34 or 36 inches. Higher countertops are more common in premium hotel rooms and are preferred by taller users.
Cabinet Body Height
This is the actual height of the vanity cabinet. Subtract this from the countertop height and you get the floor clearance. A 20-inch cabinet under a 34-inch countertop leaves 14 inches below.
Bottom Floor Clearance
Fourteen inches of floor clearance is common in most hotel and apartment projects. This space must be large enough to clean under, run pipe connections, and — in accessible rooms — allow knee clearance. Confirm this number on the drawing before production.
If you are managing a large project with multiple room types, it is easy to assume that floor clearance is the same across all rooms. It is not always. A standard room may use a 36-inch countertop with a 22-inch cabinet. An accessible room may need a lower countertop with the same clearance but different mounting height. These numbers must be confirmed room type by room type, not assumed to be the same.
How Do ADA Requirements Affect Floating Bathroom Vanity Dimensions?
Most hotel and apartment buyers know they need some accessible rooms, but ADA requirements are often added late — after dimensions are already set. That is when problems start.
ADA requirements affect floating vanity height, knee clearance, toe clearance, pipe protection, and sink position. Accessible vanities typically need a lower countertop — around 34 inches or less — with at least 27 inches of knee clearance underneath and pipes that are insulated or covered to protect users.
Lower Countertop Height
Accessible rooms usually require the countertop to be no higher than 34 inches. This means the entire mounting height must be recalculated. Do not assume the same floating bathroom vanity height used in standard rooms will work in accessible ones.
Knee and Toe Clearance
ADA standards require clear floor space for a forward approach to the sink. Knee clearance must be planned below the bowl, faucet controls, and any operable parts. The cabinet design may need open space beneath or removable panels to allow wheelchair access.
Pipe Insulation and Protection
ADA also requires that supply pipes and drain pipes beneath the sink be insulated, covered, or arranged so they cannot be contacted. Sharp or abrasive surfaces are not allowed. This affects how the floating bathroom cabinet is designed inside and how the plumber runs the connections.
Sink Depth and Faucet Reach
Sink bowl depth and faucet placement must be reviewed for accessible rooms. A deep bowl may reduce the usable knee space. A faucet placed too far back may be out of reach. These details must be confirmed on the product drawing, not assumed from a standard room layout.
Many buyers treat ADA rooms as an afterthought. They order all vanities to one spec and then try to modify a few for accessible rooms at the end. This approach almost always causes delays. If your project includes accessible rooms, confirm ADA dimensions at the same time as standard room dimensions — not after production has started.
How Do Plumbing Rough-Ins Affect Floating Vanity Dimensions?
Plumbing rough-in positions are set inside the wall before the vanity arrives on site. If the vanity dimensions do not match the rough-in, the installation either looks wrong or requires expensive rework.
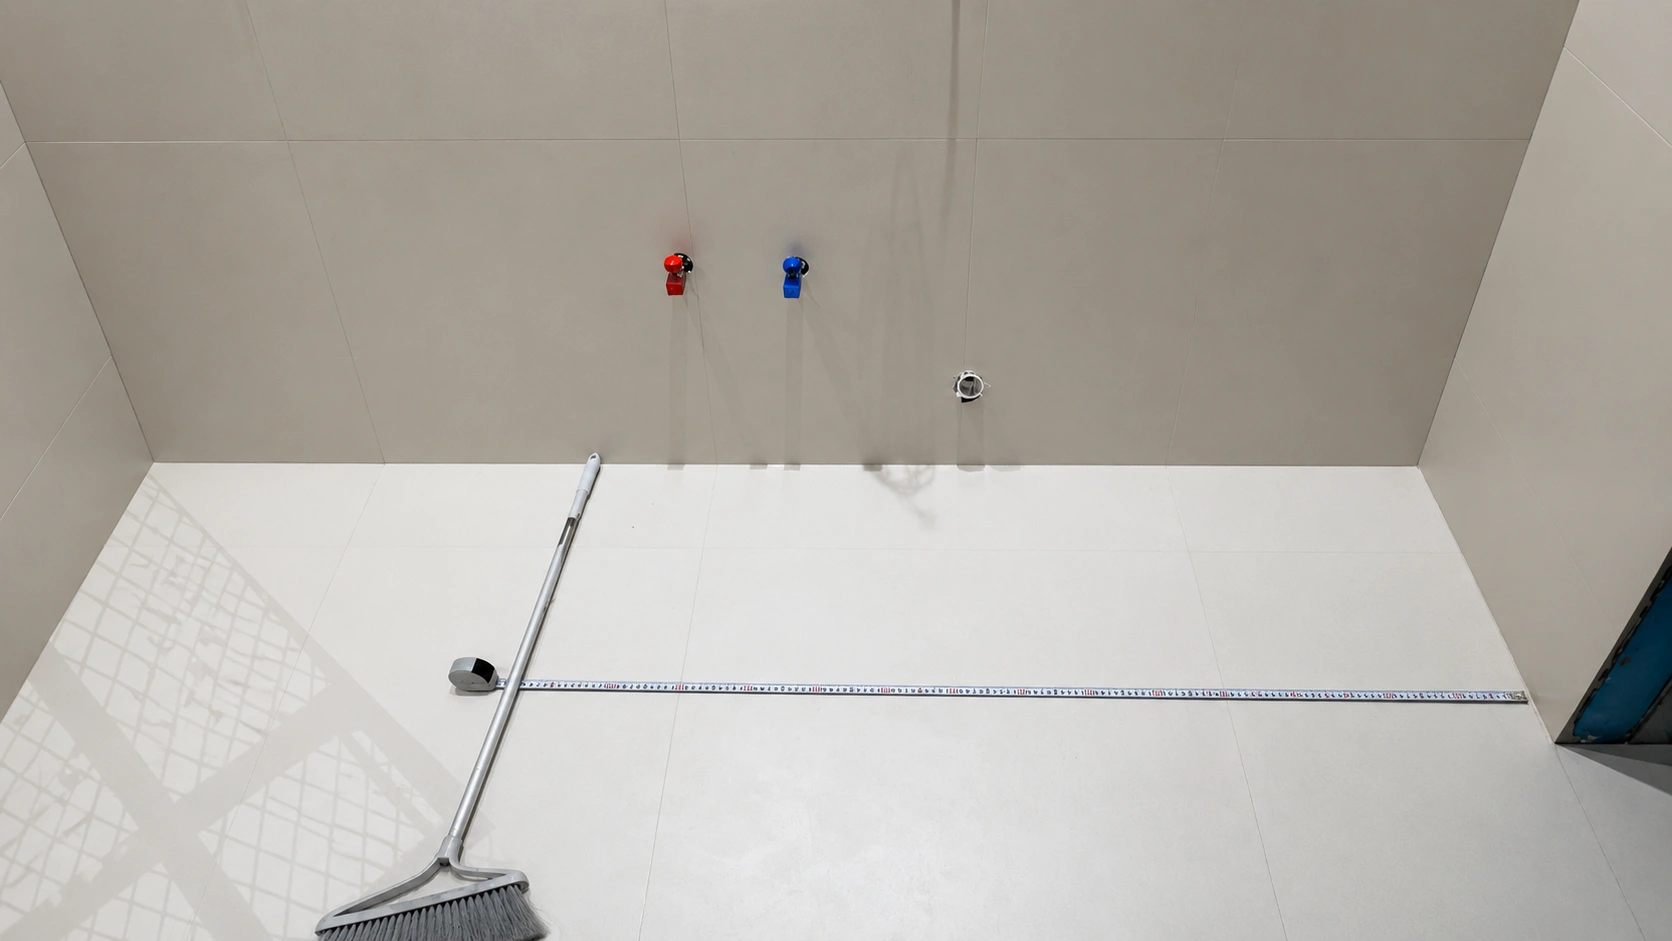
Floating vanity dimensions must be confirmed against the drain position, hot and cold water inlet positions, and P-trap space before production. A drawer placed over a drain pipe location, or a cabinet that is too shallow for the P-trap, will cause serious installation problems.
Drain Position
The drain centerline must sit inside the cabinet base, away from drawers and cabinet frames. If the drain is too far left or right, it may conflict with a drawer box or cabinet wall. Confirm the drain position on the rough-in drawing before setting vanity width.
Hot and Cold Water Inlet Position
Water inlets are usually in the wall behind the sink. If the cabinet depth is too shallow, the inlets may end up behind a fixed panel. Confirm that the inlet positions are accessible inside the cabinet after installation.
P-Trap Space
The P-trap connects the drain to the wall pipe. It takes up vertical and horizontal space inside the cabinet. Drawers placed directly below the sink must be checked against the P-trap path. Many buyers discover this conflict only after the cabinet arrives on site.
Exposed Pipe Appearance and Maintenance Access
In a floating vanity bathroom, the area below the cabinet is visible. If pipes are exposed, they must be arranged neatly or covered. Also confirm that the plumber has access to shutoffs and connections after installation without removing the entire cabinet.
Rough-in conflicts are one of the most common reasons floating vanity installations are delayed on hotel renovation sites. By the time the cabinet arrives, the rough-ins are in the wall and cannot be moved without breaking tile. The only way to avoid this is to share the rough-in drawing with the vanity supplier before production, not after shipping.
Are Floating Vanity Dimensions Different from Freestanding Vanity Dimensions?
Width options for floating and freestanding vanities often overlap. But the way you plan and confirm dimensions is very different between the two types.
Floating vanity dimensions are more sensitive to wall structure, plumbing position, and mounting height than freestanding vanity dimensions. Freestanding vanities sit on the floor and hide plumbing more easily. Floating vanities expose more of the wall and pipe area, which makes every dimension more visible and more critical.
| Item | Floating Vanity | Freestanding Vanity |
|---|---|---|
| Installation | Wall-mounted | Floor-supported |
| Height | More flexible, set by mounting position | Usually fixed by cabinet height |
| Cleaning | Easier under cabinet | Floor contact area may collect dirt |
| Storage | May be slightly reduced | Usually more cabinet volume |
| Wall requirement | Very important | Less critical |
| Plumbing exposure | More visible, more sensitive | Easier to hide behind cabinet |
| Project risk | Wall load, pipe coordination, mounting | Moisture at base, floor leveling |
The table above shows why project risk is different for each type. A freestanding vanity sits on the floor and hides most of its base. A floating bathroom cabinet puts everything on the wall — the mounting, the pipes, the gap below. This means the floating vanity size for bathroom must be confirmed more carefully, with more coordination between the cabinet supplier, the plumber, and the installation team.
How Should Hotels and Apartments Choose Floating Vanity Dimensions?
Project buyers often ask me which size to choose. My answer is always the same: it depends on the room type. One size does not work for every room in a project.
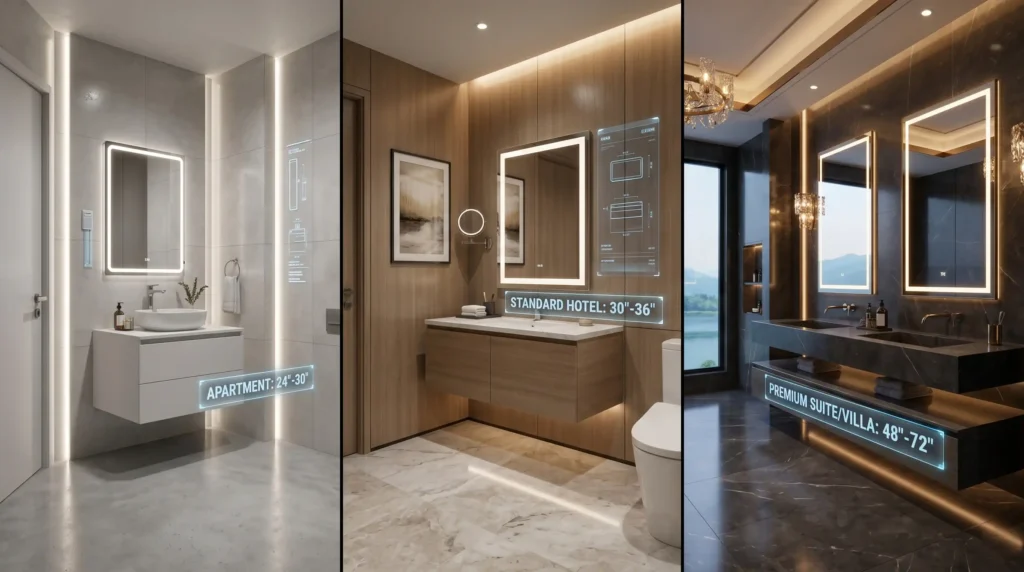
Hotels and apartments should choose floating vanity dimensions based on room type and use. Standard hotel rooms usually work well with a floating vanity bathroom 30 inch or 36 inch wide. Small apartments fit 24 to 30 inches. Premium suites, resorts, and villas may need 48, 60, or 72-inch vanities.
Standard Hotel Rooms
A 30-inch or 36-inch floating vanity fits most standard hotel room bathrooms. These sizes leave enough space for door swing and toilet clearance while still providing usable counter space. A floating bathroom vanity 24 inch wide is also used in very compact hotel bathrooms where space is tight.
Small Apartments
Small apartments and studio units with limited bathroom space usually use 24 to 30-inch vanities. The vanity size for bathroom in these units must be confirmed against the full room layout, not just the bathroom wall. Door swing, toilet position, and shower entry all affect how much width is usable.
Premium Suites, Resorts, and Villas
High-end rooms with larger bathrooms use 48, 60, or 72-inch vanities. Double-sink vanities are common. These projects also have tighter tolerances for finish quality and visual alignment, so dimensions must be confirmed with more detail — including mirror position, lighting centerline, and countertop overhang.
Standardize Sizes Within a Project
For bulk orders, keep the number of different vanity sizes as low as possible. Using three or four different widths across a project multiplies the risk of mix-ups during shipping and installation. The best approach is to group room types and assign one vanity size to each group.
I have seen projects where buyers ordered five different vanity widths across 200 rooms. Every width needed a different rough-in position, a different mirror size, and different installation instructions. This created delays at every stage. Fewer sizes means fewer risks — and that principle applies to floating vanity dimensions as much as anything else in a project.
Project Snapshot: 250-Room Resort Renovation
How Should Project Buyers Confirm Floating Vanity Dimensions Before Bulk Production?
Confirming dimensions before bulk production is not a single conversation. It is a checklist. Every item on that list must be confirmed in writing before production starts.
Project buyers should confirm floating vanity dimensions using a structured checklist that covers room layout, finished wall size, cabinet dimensions, plumbing positions, sink type, ADA requirements, and installation method. Skipping any item on this list creates risk during installation.
Use this checklist before approving bulk production:
- Room layout drawing — confirmed and dimensioned
- Finished wall-to-wall size — not rough wall, finished wall
- Vanity width — matched to wall size with clearance on each side
- Countertop height — agreed with interior design team
- Cabinet body height — confirmed against countertop height and floor clearance
- Bottom floor clearance — confirmed for cleaning and accessibility
- Sink type and position — undermount, vessel, or integrated
- Faucet type — single hole, three hole, or wall mount
- Drain centerline position — confirmed against rough-in drawing
- Water inlet position — hot and cold, confirmed in wall
- Wall material and reinforcement — blocking must be in place before delivery
- ADA or accessibility requirement — which rooms, which dimensions
- Mirror and lighting position — centerline matched to vanity width
- Quantity by room type — confirmed per floor plan
- Installation method — who installs, what fasteners, what wall anchors
- Packaging and replacement plan — spare parts, damage replacement process
This checklist is not a guarantee. But every item on it represents a real problem I have seen happen on a real project. The buyers who skip steps do not find out until the cabinet is on site. By then, the cost to fix it is always higher than the cost to confirm it upfront.
What Common Dimension Mistakes Cause Floating Vanity Installation Problems?
Most floating vanity installation problems are not caused by bad products. They are caused by dimension decisions that were made without enough information. Here are the eight mistakes I see most often.
The most common floating vanity dimension mistakes include choosing width without checking wall length, ignoring door swing, forgetting countertop thickness, and placing drawers where drain pipes need to run. Each mistake is avoidable if dimensions are confirmed before production.
1. Choosing Cabinet Width Without Checking Wall Length
The finished wall may be shorter than the rough wall. If you measure the wrong surface, the cabinet will not fit. Always confirm width against the finished wall dimension.
2. Ignoring Door Swing and Toilet Clearance
A 36-inch vanity may leave only a few inches between the cabinet edge and the toilet. If the door also swings into that space, nothing fits. Check the full bathroom layout, not just the vanity wall.
3. Setting Countertop Height Too High After Adding a Vessel Sink
A vessel sink sits on top of the countertop and adds 5 to 7 inches of height. If you use the same mounting height as an undermount sink, the countertop becomes too tall to use comfortably. The floating bathroom vanity height must account for the sink style.
4. Forgetting Countertop Thickness
Countertops add 0.75 to 1.5 inches or more above the cabinet top. If you set the cabinet mounting height without accounting for countertop thickness, the final countertop height will be higher than planned.
5. Placing Drawers Where the Drain Pipe Needs to Pass
Drawers below the sink must be checked against the drain and P-trap path. A full-depth drawer directly below the sink basin will conflict with the drain pipe. This must be resolved in the drawing, not on site.
6. Not Confirming Wall Reinforcement Before Production
Floating vanities are heavy, especially when loaded with toiletries and a stone countertop. The wall must have blocking or a solid backing to carry that load. If the reinforcement is not in the wall before delivery, installation cannot proceed safely.
7. Using One Dimension for Both Standard and Accessible Rooms
Standard and ADA rooms need different countertop heights and floor clearances. Using one vanity spec for both room types will result in either non-compliant accessible rooms or uncomfortable standard rooms.
8. Exposing Ugly Pipework Under the Floating Cabinet
In a floating vanity bathroom, the space below is always visible. Pipes running in multiple directions without coordination look bad and are hard to clean. Plan pipe routing as part of the vanity installation, not as an afterthought.
Most of these mistakes share one cause: dimensions were decided too early, without enough information from the site. The earlier in the project you confirm floating vanity dimensions from actual drawings, the fewer problems you will face during installation.
Conclusion
Standard floating bathroom vanity dimensions are just a starting point. For hotel and apartment projects, the right size must match the wall, the plumbing, the countertop, and the room type. Confirm every dimension before bulk production. If you need help reviewing your project drawings or choosing the right floating vanity dimensions for your rooms, contact us at georgebuildshop.com.
Let Our Experts Review Your Project Drawings
Avoid costly installation mistakes. Submit your room layouts below. Our engineering team will review your specs, optimize your floating vanity dimensions, and provide a comprehensive quote for your entire bathroom package—from custom vanities and luxury shower enclosures to toilets and hardware.
👇 Fill out the form below to get started 👇